Welcome to Your Free Trial
Congratulations! You’re on your way to joining over 8.6 million users who rely on LanScope Cat to protect and manage their endpoints. Your 14-day free trial of LanScope Cat creates an individualized and private virtual AWS environment – just for you. You’ll be wielding the power of unprecedented endpoint security monitoring in just a few easy steps.
Please note: You must log in to your free trial environment within 72 hours of receiving your Welcome Email, otherwise your credentials will expire. After your initial login, you’ll have 14 days to enjoy your free trial.
What you need to get started:
- A device* with RDP (remote desktop protocol) and an internet connection.
* We recommend using a Windows desktop or laptop running Windows XP through Windows 10 or Windows Server 2003 through Windows Server 2012 R2 to remotely connect to your free trial environment.
- Your Welcome Email with your free trial credentials (Didn’t get your Welcome Email? Contact us at support@interfocus.us).
Need help along the way?
Our support technicians are standing by to assist you. Get in touch!
Email: support@interfocus.us
Set Up Your Free Trial

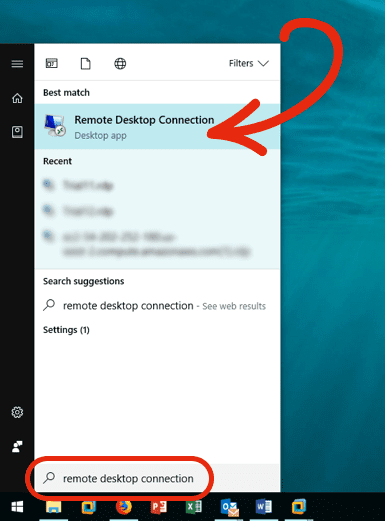
Step 1
- Click your Microsoft home button and type “Remote Desktop Connection” (or “RDP” or “MSTSC”) in the search field.
- Click the “Remote Desktop Connection” icon.
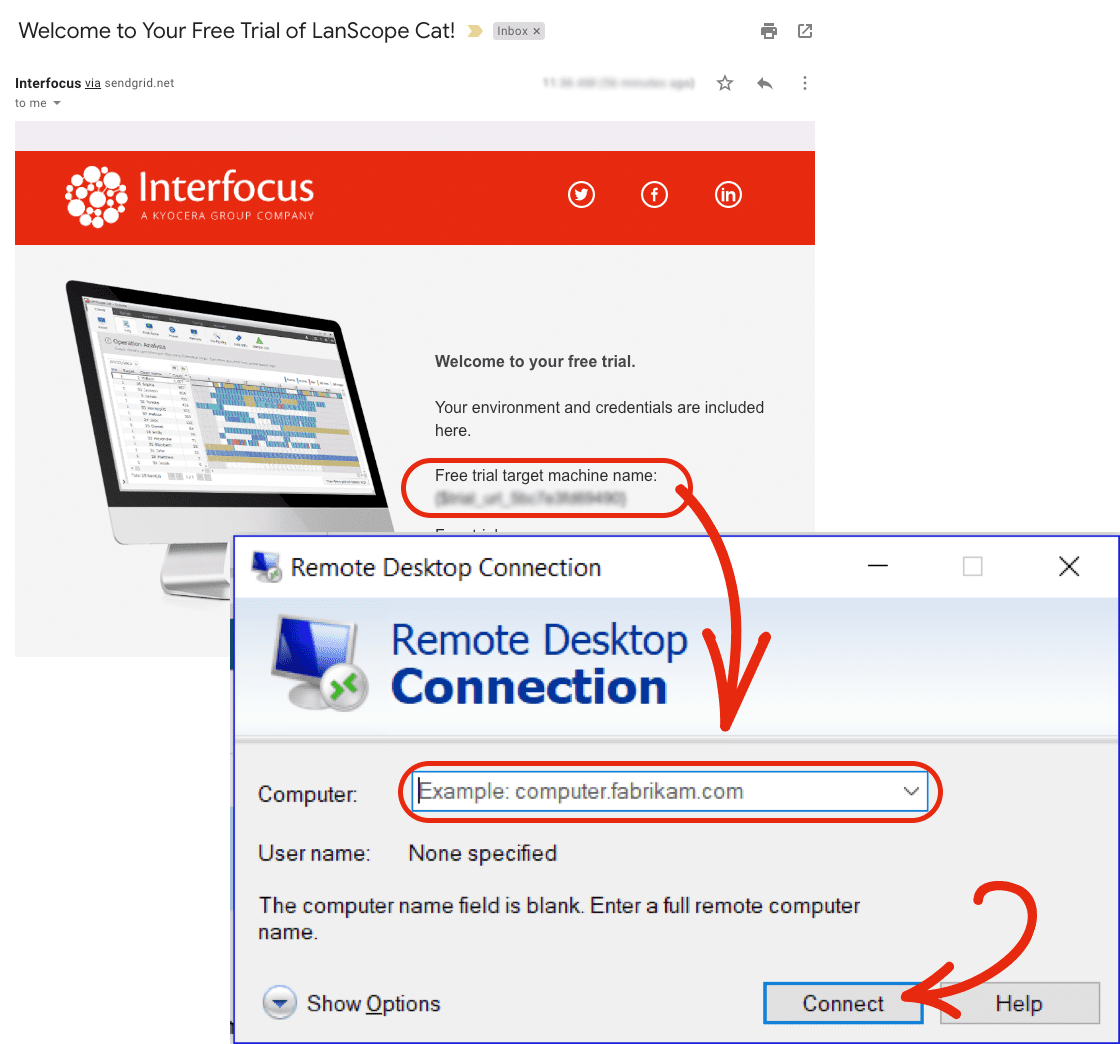
Step 2
- Copy the target machine name from your Welcome Email and paste into the “Computer” field. The name should look like:
ec2-<ip address and region indicator>.compute.amazonaws.com
- Click ”Connect.”
- If you are running “User Account Control” a dialogue box will appear asking if you trust this remote connection. Click “Connect” to continue.
Step 3
- Next you will be asked to enter your credentials. The role of “Administrator” should already be selected.
- If “Administrator” is not already selected, click “more choices” and then “use a different account.”
- Enter “Administrator” in the email field.
- Copy the password from your Welcome Email and paste it into the ”Administrator” password field.
- Click “OK.”
- You will be alerted that the identity of the remote computer cannot be verified.
- Click “yes” you want to connect anyway.

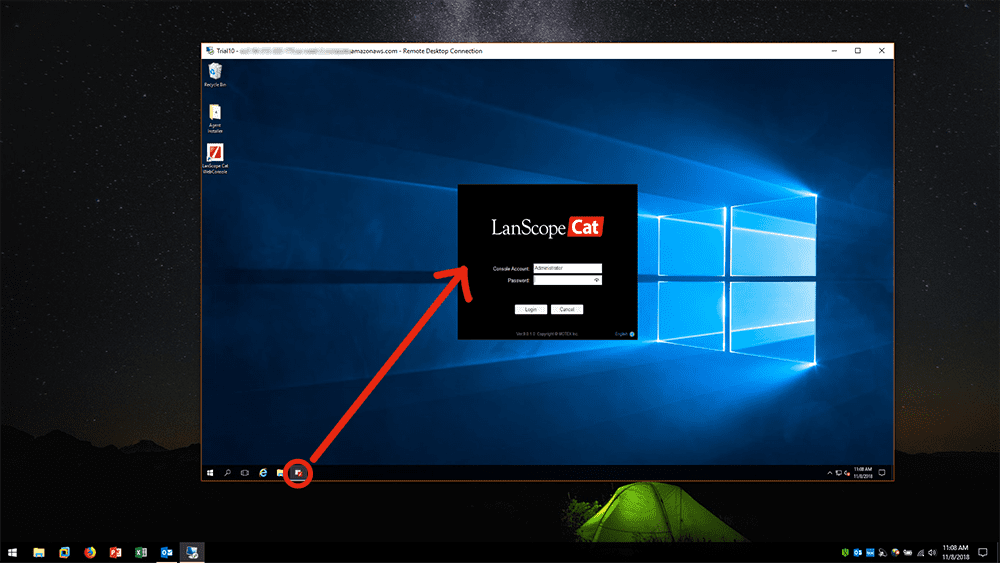
Step 4
You are now connected to your free trial virtual environment! You can access the LanScope Cat Console with these credentials:
- Console Account: Administrator
- Password: motex
By default, the Monitoring Agent is installed on your virtual machine as the first device you can monitor. You can connect up to 9 more devices as part of your free trial.
Next Steps:
Explore & Configure
Access the LanScope Console
- After logging into your virtual environment (learn how), you’re ready to start exploring and configuring the LanScope Cat Console.
- Click the “LanScope Cat Console” icon on the desktop of your virtual environment.
- In the console, click “Settings.”
By default, your security policies are set up for detection, which means that activity will be logged but no automatic action will occur. You may wish to explore other features, including setting up the policy to quarantine machines associated with suspicious behavior.
Need help customizing your free trial?
Our support technicians are standing by to assist you. Get in touch!
Email: support@interfocus.us

Monitor More Devices
Connecting More Devices to Your Free Trial Environment
You can connect an additional 9 Windows laptops or desktops to your free trial environment by installing the LanScope Cat Monitoring Agent on local devices.
Please note: For trial purposes, the additional machines must be running Windows XP through Windows 10 or Windows Server 2003 through Windows Server 2012 R2.
Get the Monitoring Agent
- Log into your virtual environment (learn how).
- Click the Agent Installer folder icon on the desktop of your virtual environment.
- Copy the file “LanScope Install_TIxx.exe” to an external (e.g., USB drive) or locally networked drive.

Install the Monitoring Agent
Installation typically takes less than 5 minutes!
Please note: For trial purposes, the additional machines must be running Windows XP through Windows 10 or Windows Server 2003 through Windows Server 2012 R2.
- Exit the virtual environment and log into the local device you want to add.
- Make sure the device is connected to the local network and the TCP Port 38000-38014 is open.
- Double click the “LanScope Install_TIxx.exe” file to install it. Click “Yes” to start the installer.
- You will see 2 dialogue boxes appear while the Monitoring Agent installs, a command line window and the CylancePROTECT Setup window.
- On the CylancePROTECT Setup window, click “Install.” If you have “User Account Control” on your machine, click “Yes.”
- Leave the default installation token value and click “Next.”
- Next you’ll choose the installation location (by default, the application installs on the desktop).
- Finally, ensure that “Launch CylanceProtect” is checked, click “Finished,” then click “Close.”
- Lastly, the LanScope Cat monitoring agent will finish installing and close the command line windows automatically. If your device has “User Account Control” you will get a warning box dialogue. Click “yes” to allow the device to be monitored.
Verify Your Local Device Connection
- Log into your virtual environment (learn how).
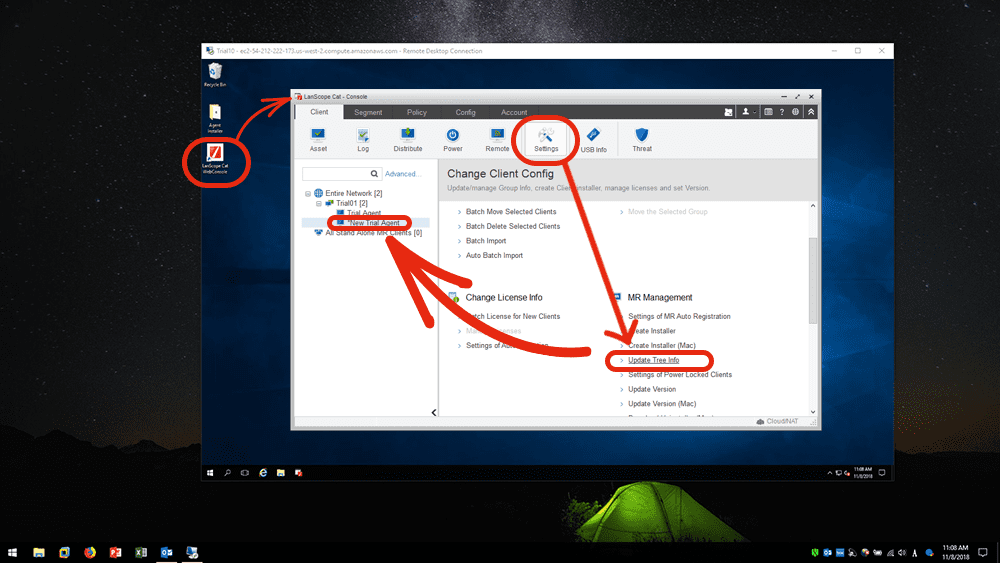
- Click the “LanScope Cat Console” icon on the desktop of your virtual environment.
- In the left panel, select “Entire Network.”
- Then select Client > Settings > Update Tree Info in MR Management.
- The blue PC icon will appear with its PC name, verifying the device is being monitored.